
Courtesy Jordan Champagne, chef, instructor
and co-founder, Happy Girl Kitchen
Be forewarned that your miso will take a minimum of a year to ferment. But it’s worth the wait. Aside from being a versatile and delicious condiment, miso is also a complete protein containing all of the amino acids essential to human nutrition. In addition, it contains an alkaloid called dipicolinic acid that binds with heavy metals and carries them out of the body, making it very detoxifying.
Miso can be made out of various beans and grains, each lending a different color, texture and flavor to the final product; experiment by making different combinations in small batches. Traditionally miso is made with soybeans, koji and salt. Koji is made from grain or beans that have been inoculated with spores of Aspergillus oryzae, a mold that starts the miso fermentation.
Koji can be found locally in Japanese markets or can be ordered online from companies such as GEM Cultures Inc.
2 kilograms rice koji
2 kilograms soybeans, cooked
0.8 kilograms sea salt
The beans should be cooked thoroughly until they are very soft when pressed between your thumb and baby finger. Drain beans and reserve some of the liquid. Next, you need to grind or mash your beans to a creamy consistency. The Japanese traditionally used a mortar and pestle, but you can also use a potato masher or meat grinder.
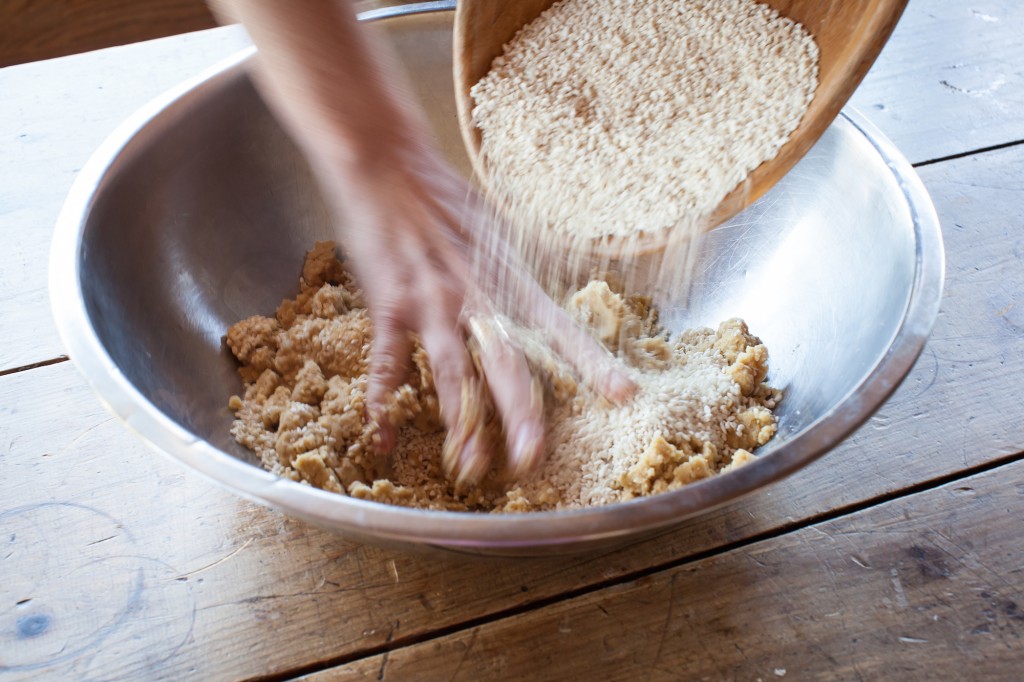
While the beans are still warm, massage them together with the koji. Add the salt and mix completely. The consistency should be a moist paste, kind of like miso. If it is too dry, add some reserved liquid.
The vessel in which you ferment your miso should be of food grade (safe for food). To inhibit unwanted mold growth, first put a layer of sea salt on the bottom of the container.
The next part, a special technique for eliminating air pockets as you load the miso into your vessel, is a lot of fun. Techniques such as this are awkward to start but become mastered over time through practice.
Using your fist, make a ball of the paste and then fling it into the bottom of your bucket or crock with great force, filling the container with one ball at a time. This is also a great time to send good thoughts and blessings into your preserve.
Lastly, cover the miso paste with a thick layer of salt to inhibit unwanted mold and make the container air tight by covering with a piece of wood or a ceramic plate weighed down by something heavy.
Now the long wait begins. This is the hardest part about making miso. It is recommended that you wait at least a year for your miso to be finished, but I have had 7- year miso that is simply amazing. The longer you wait, the more complex the flavors become. This gives you a chance to develop patience. It is like planting a fruit tree from which you’ll need to wait years to collect a harvest.
Once you are ready to dig into your miso, you may find a layer of mold on the top. Simply scrape it off and taste your miso. It will likely be AMAZING!!! Decant it into clean glass jars and store them in the refrigerator or in a cool, dark cupboard. If stored out of the refrigerator, however, fermentation will continue, so you must release the pressure occasionally by opening the lid.
About the author

At Edible Monterey Bay, our mission is to celebrate the local food culture of Santa Cruz, San Benito and Monterey Counties, season by season. We believe in sustainability, and we believe everyone has a right to healthful, clean and affordable food. We think knowing where our food comes from is powerful, and we hope our magazine, website and newsletters inspire readers to get to know and support our local growers, fishers, chefs, vintners and food artisans.